Creating Roads:
Roads are drawn with the mouse when the Road Edit Window is open. To open this window, first open the Roads List window from the Main Tool Window.
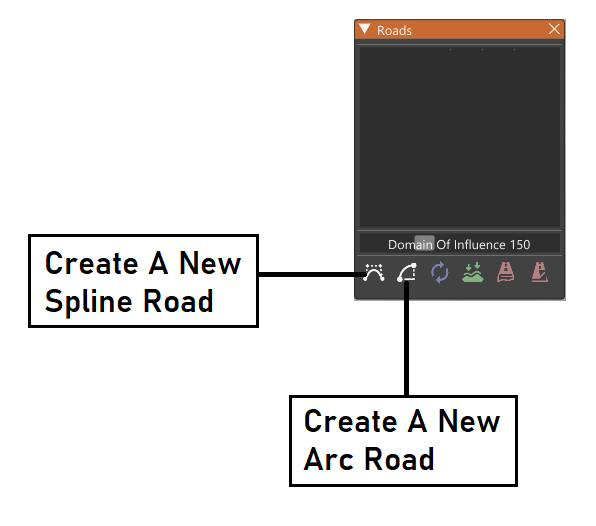
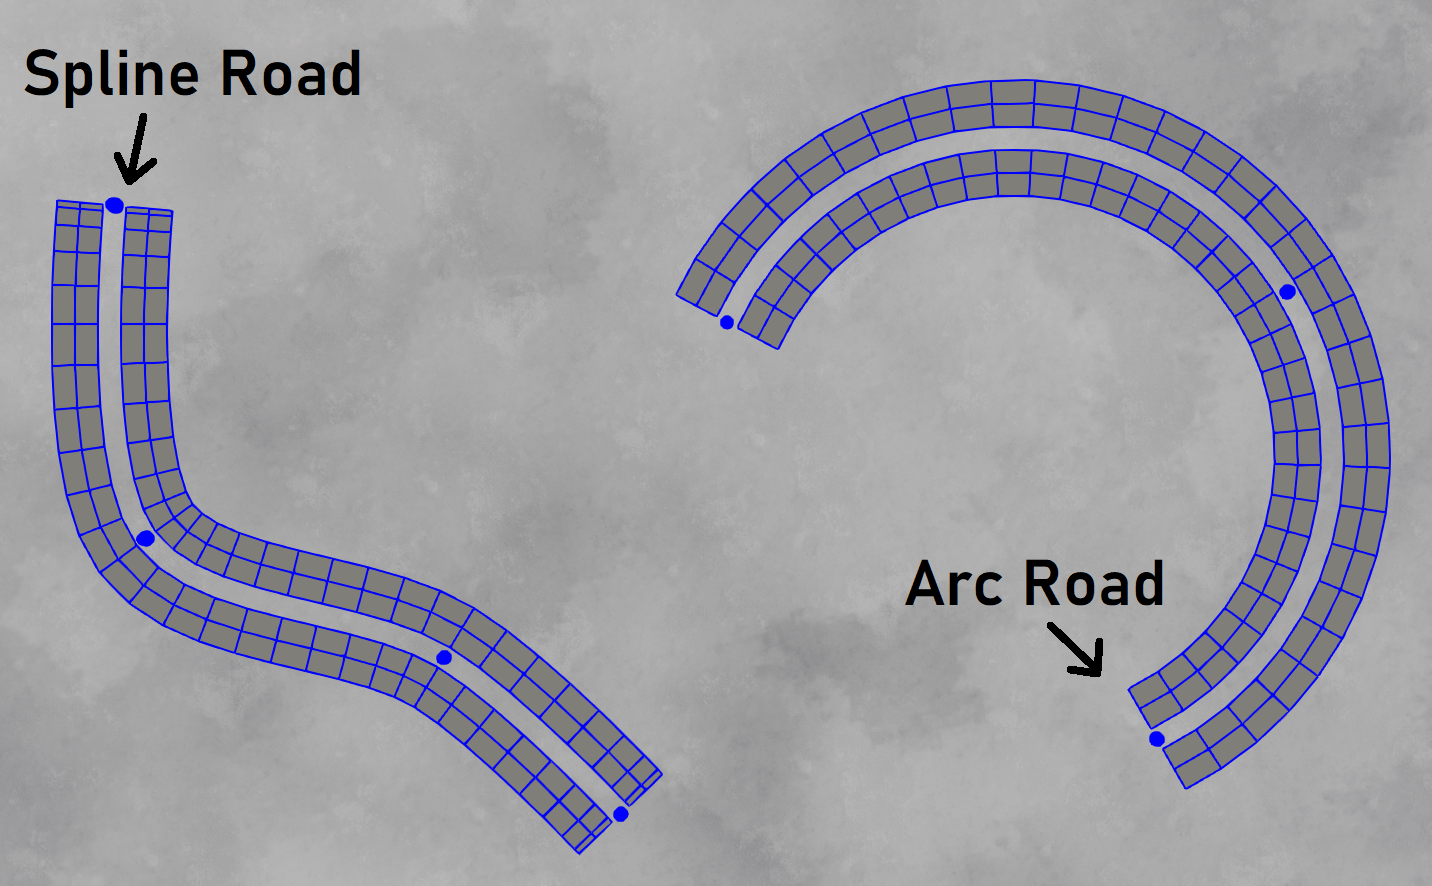
The user can then choose between either ‘spline’ roads or ‘arc’ roads. Spline roads contain any number of nodes and arc roads are limited to only three nodes. By way of example, if we select the button to add a new spline road, the corresponding Road Edit window will open.
At the mouse location on the map, a highlighted sphere will appear to indicate that road nodes can be added. Nodes are added by clicking the left mouse button. Spheres will appear at each node location as this is done.
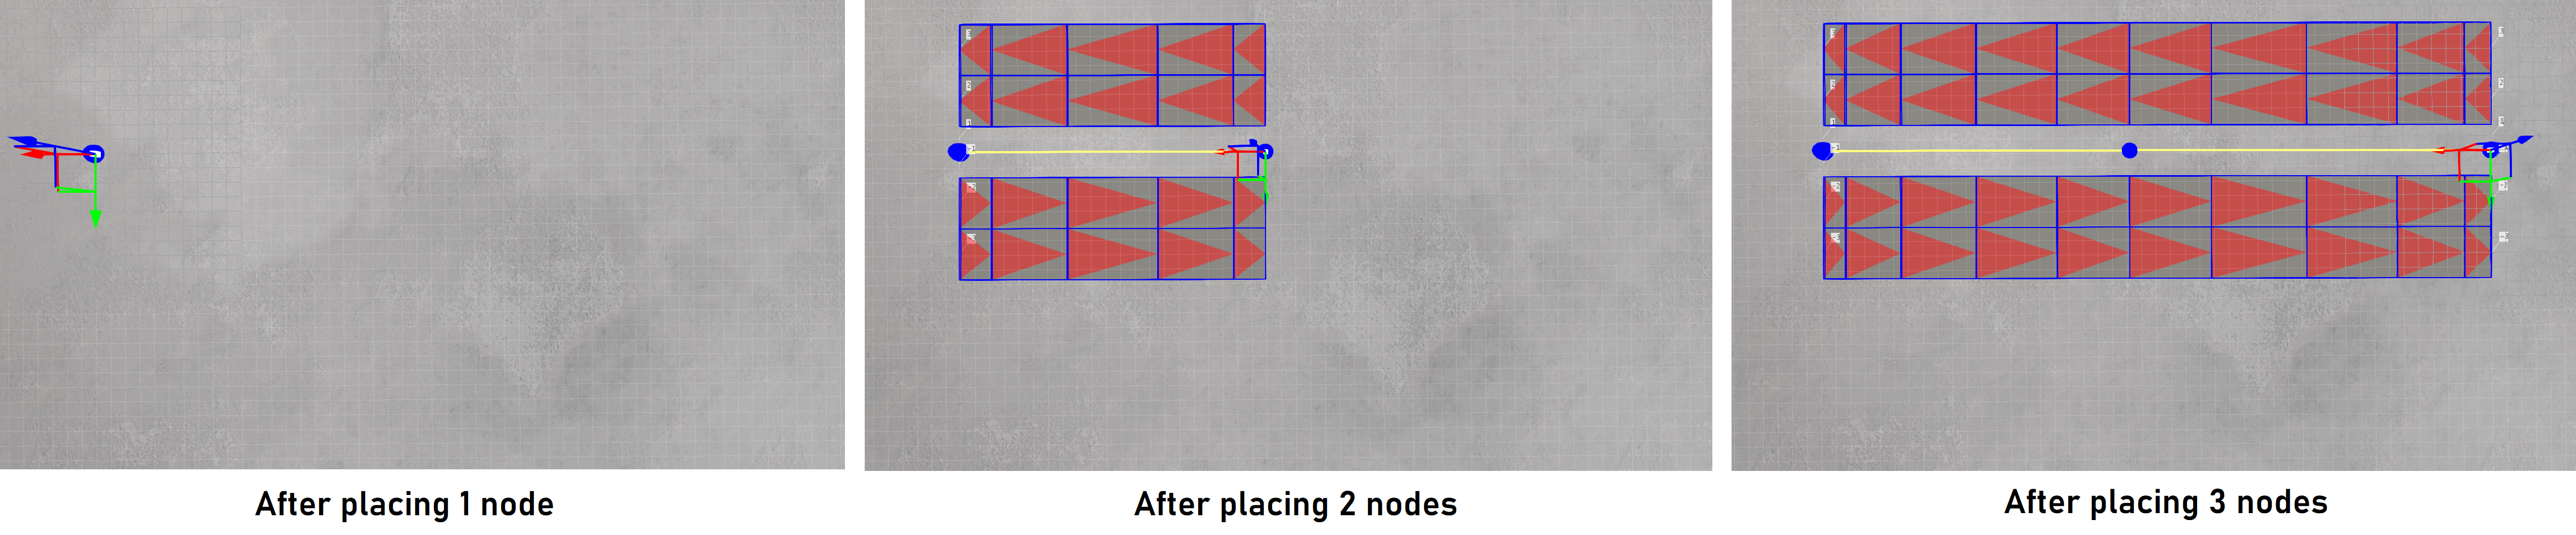
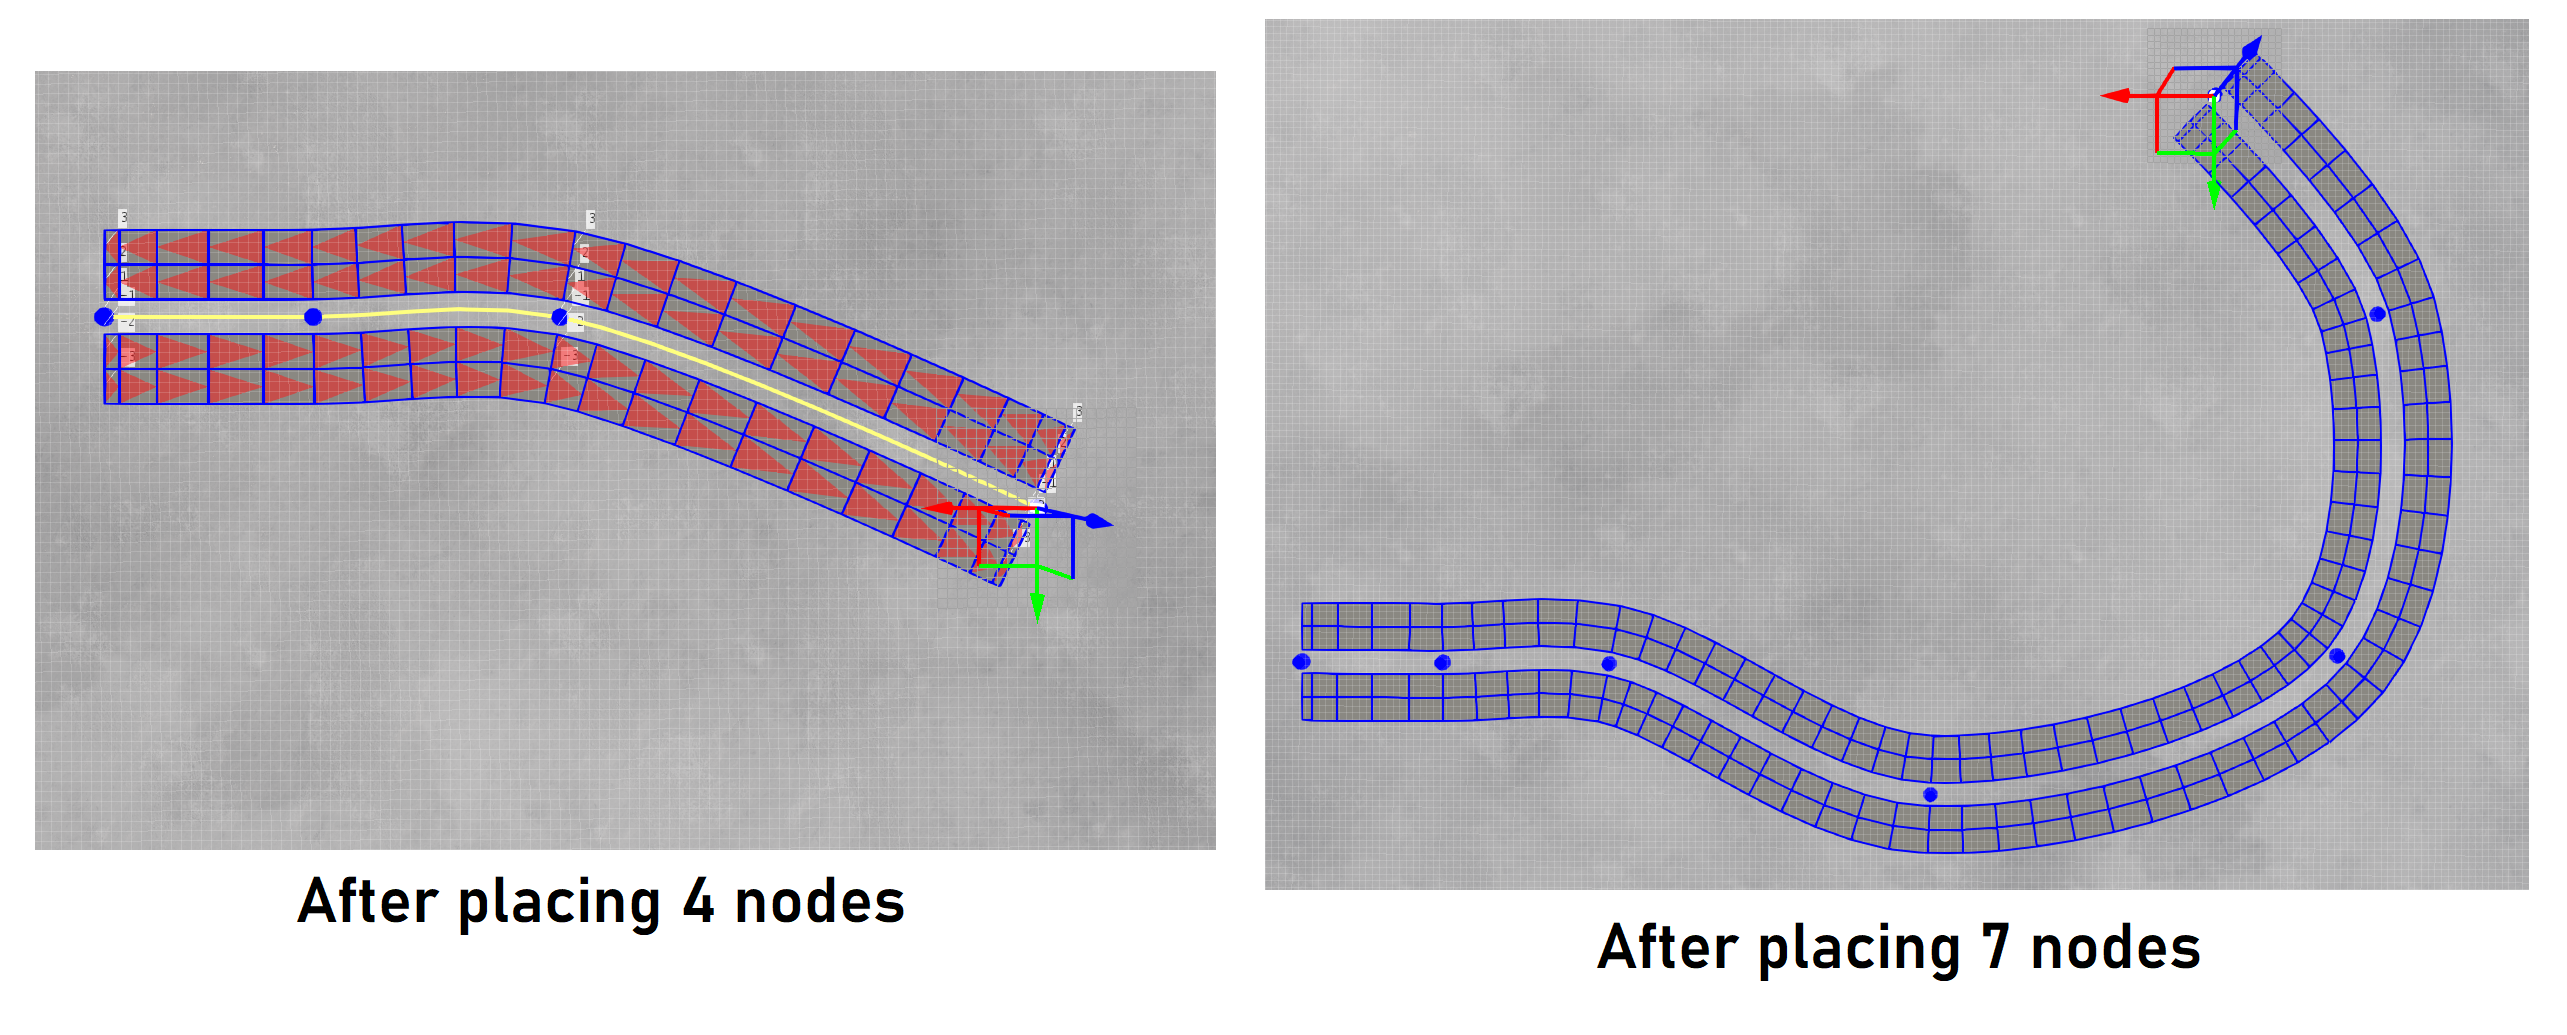
As nodes are added, the Road Edit window will show these in its list box (top of window), in an ordered fashion. If a mistake is made, CTRL-Z can be used to undo the last road edit operation (and CTRL-Y can be used to redo the operation).
Hovering over any placed node will show a transparent sphere around the node sphere. If the user holds the left mouse button down, the node position can dragged on the map. The translation gimbal will appear to indicate the selected road, and the node is also highlighted in the Road Edit Window listbox.
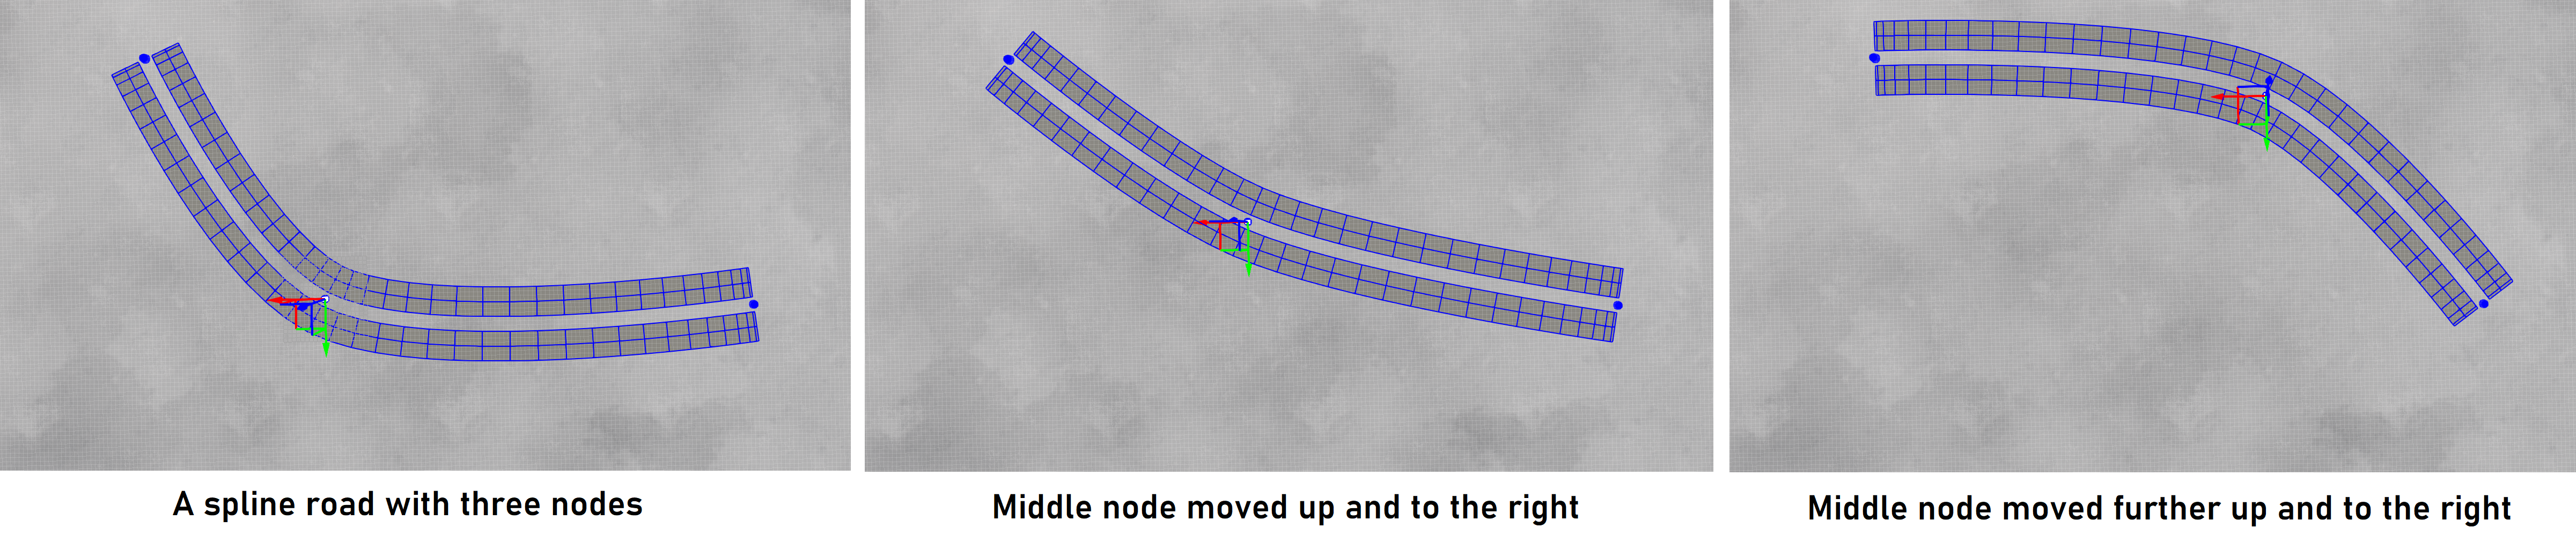
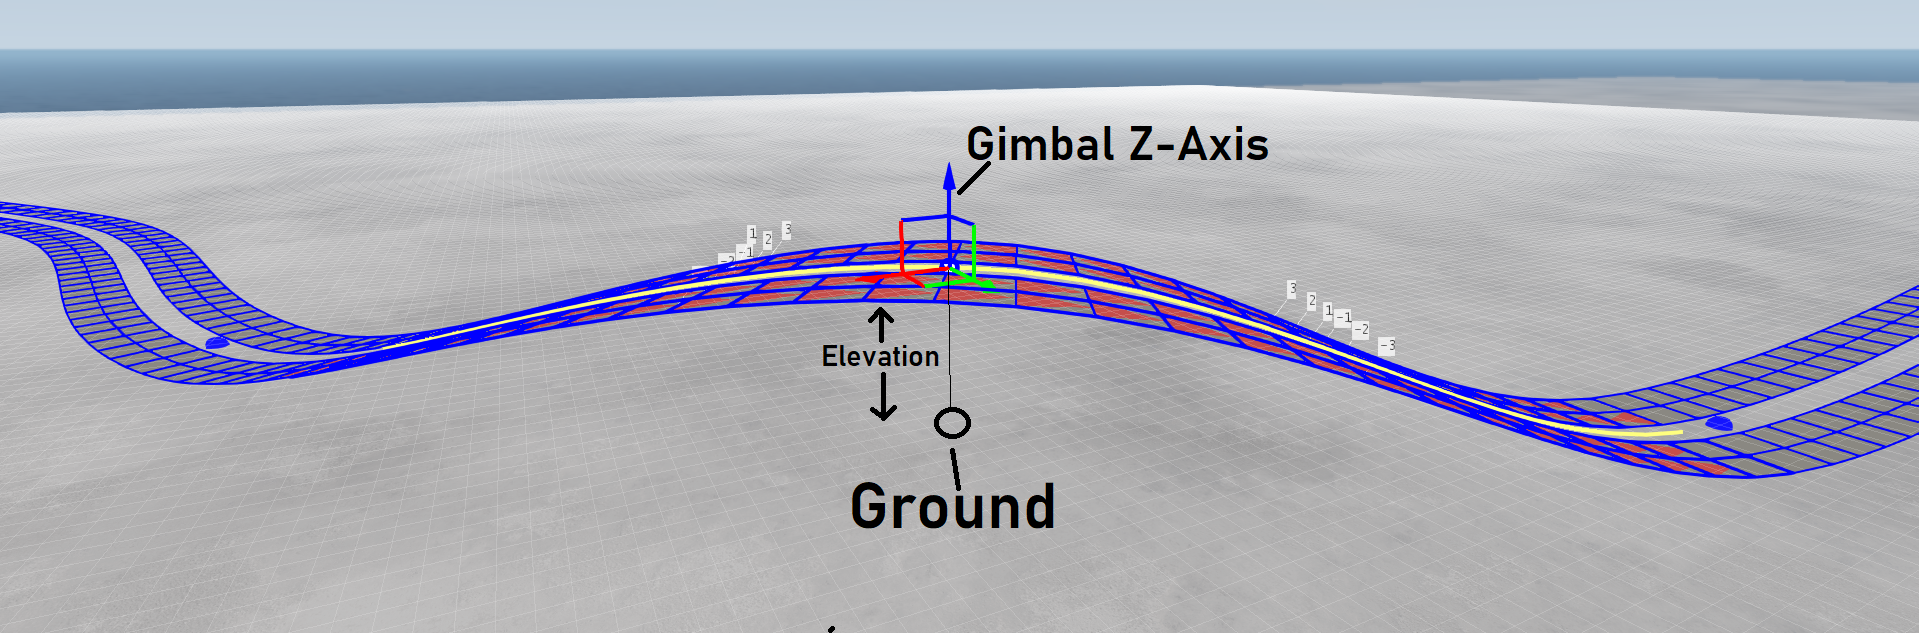
The gimbal can also be used to move nodes as required. Nodes can be raised off the map using the vertical axis of the gimbal, if required.
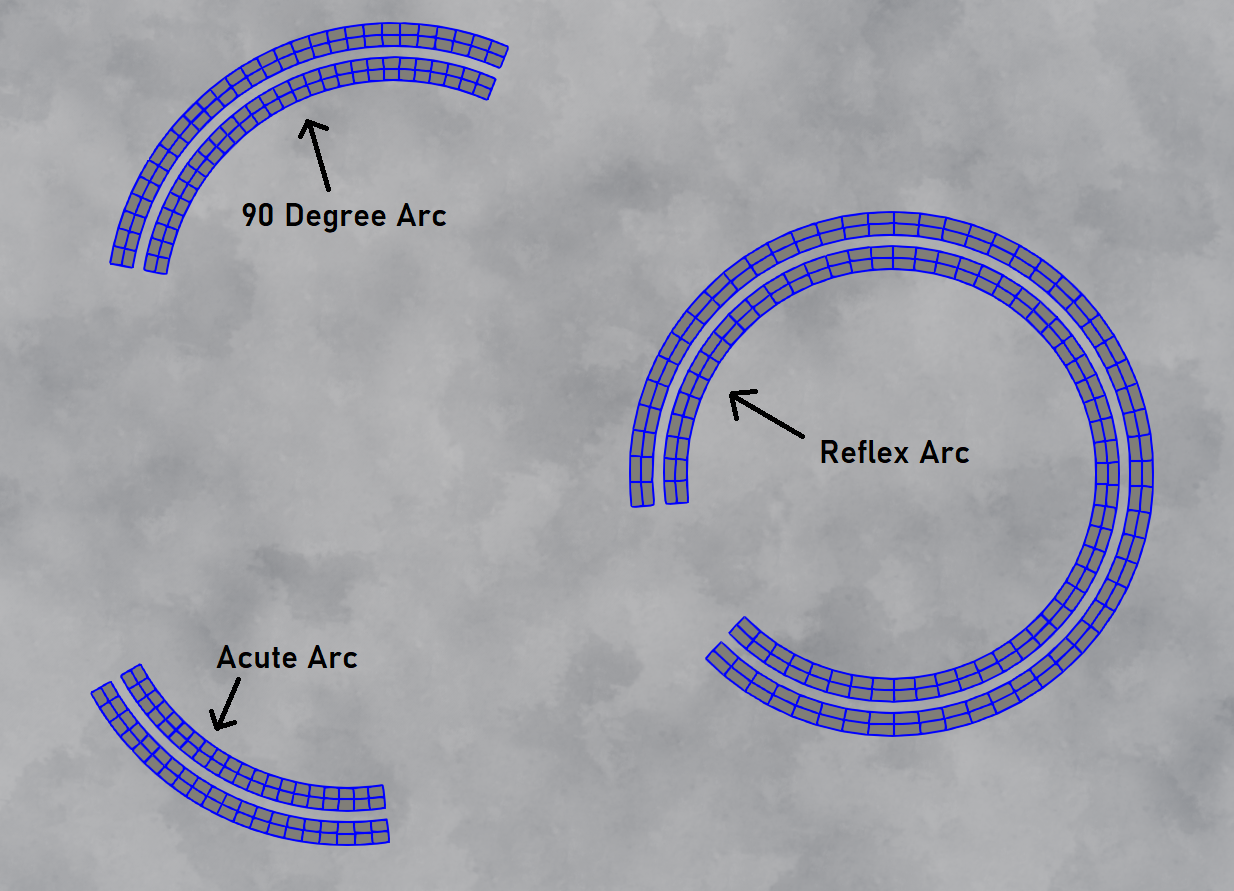
For arc roads, the user places three nodes to define the arc. These nodes can be moved on the map, which will change the curvature, size etc of the arc.
The road editing options will be discussed in more detail in later sections of this documentation.
Editable/Finalised Roads:
The two primary modes of the editor have been introduced previously. To summarise; Edit Mode allows the user to perform changes to the road/road network they are building, and Finalise Mode freezes the road and generates the road meshes, collision mesh, and road decals, etc. Finalise Mode also generates the navigation graph from the road network which should allow AI traffic to run on the network.
In Edit Mode, a simple visualisation is used to show the roads. Each component of the road can be toggled on/off as required.
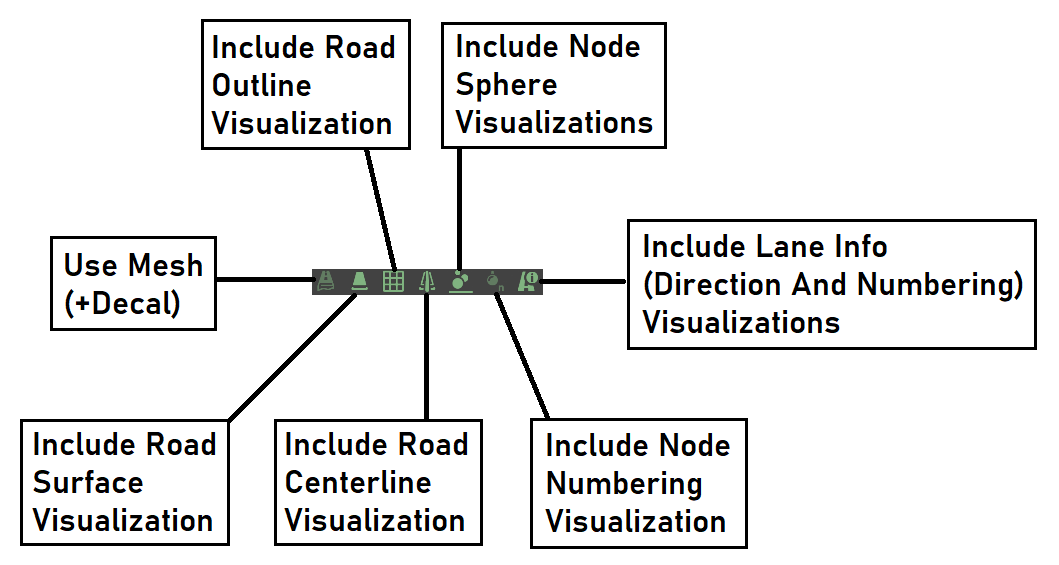 Edit Mode Visualization Buttons
These visualizations are described as follows:
The Road Surface is a connected quadrilateral mesh covering the road. It has a top and bottom surface and is joined at the edges (cuboid panels).
The Road Outline is a quadrilateral mesh of thin lines which also covers the road, and highlights properties such as the road granularity.
The Road Reference Line is a thick line which travels along the road longitudinally between the left and right sides of the road.
The Node Spheres are small coloured spheres which appear at every road node, and allow the user to grab and move them individually.
The Node Numbering is a text markup which shows the index of each road node.
The Lane Info is two things; a triangle on every road panel, in every lane, to highlight the direction of travel of that lane, and a text markup of the lane index.
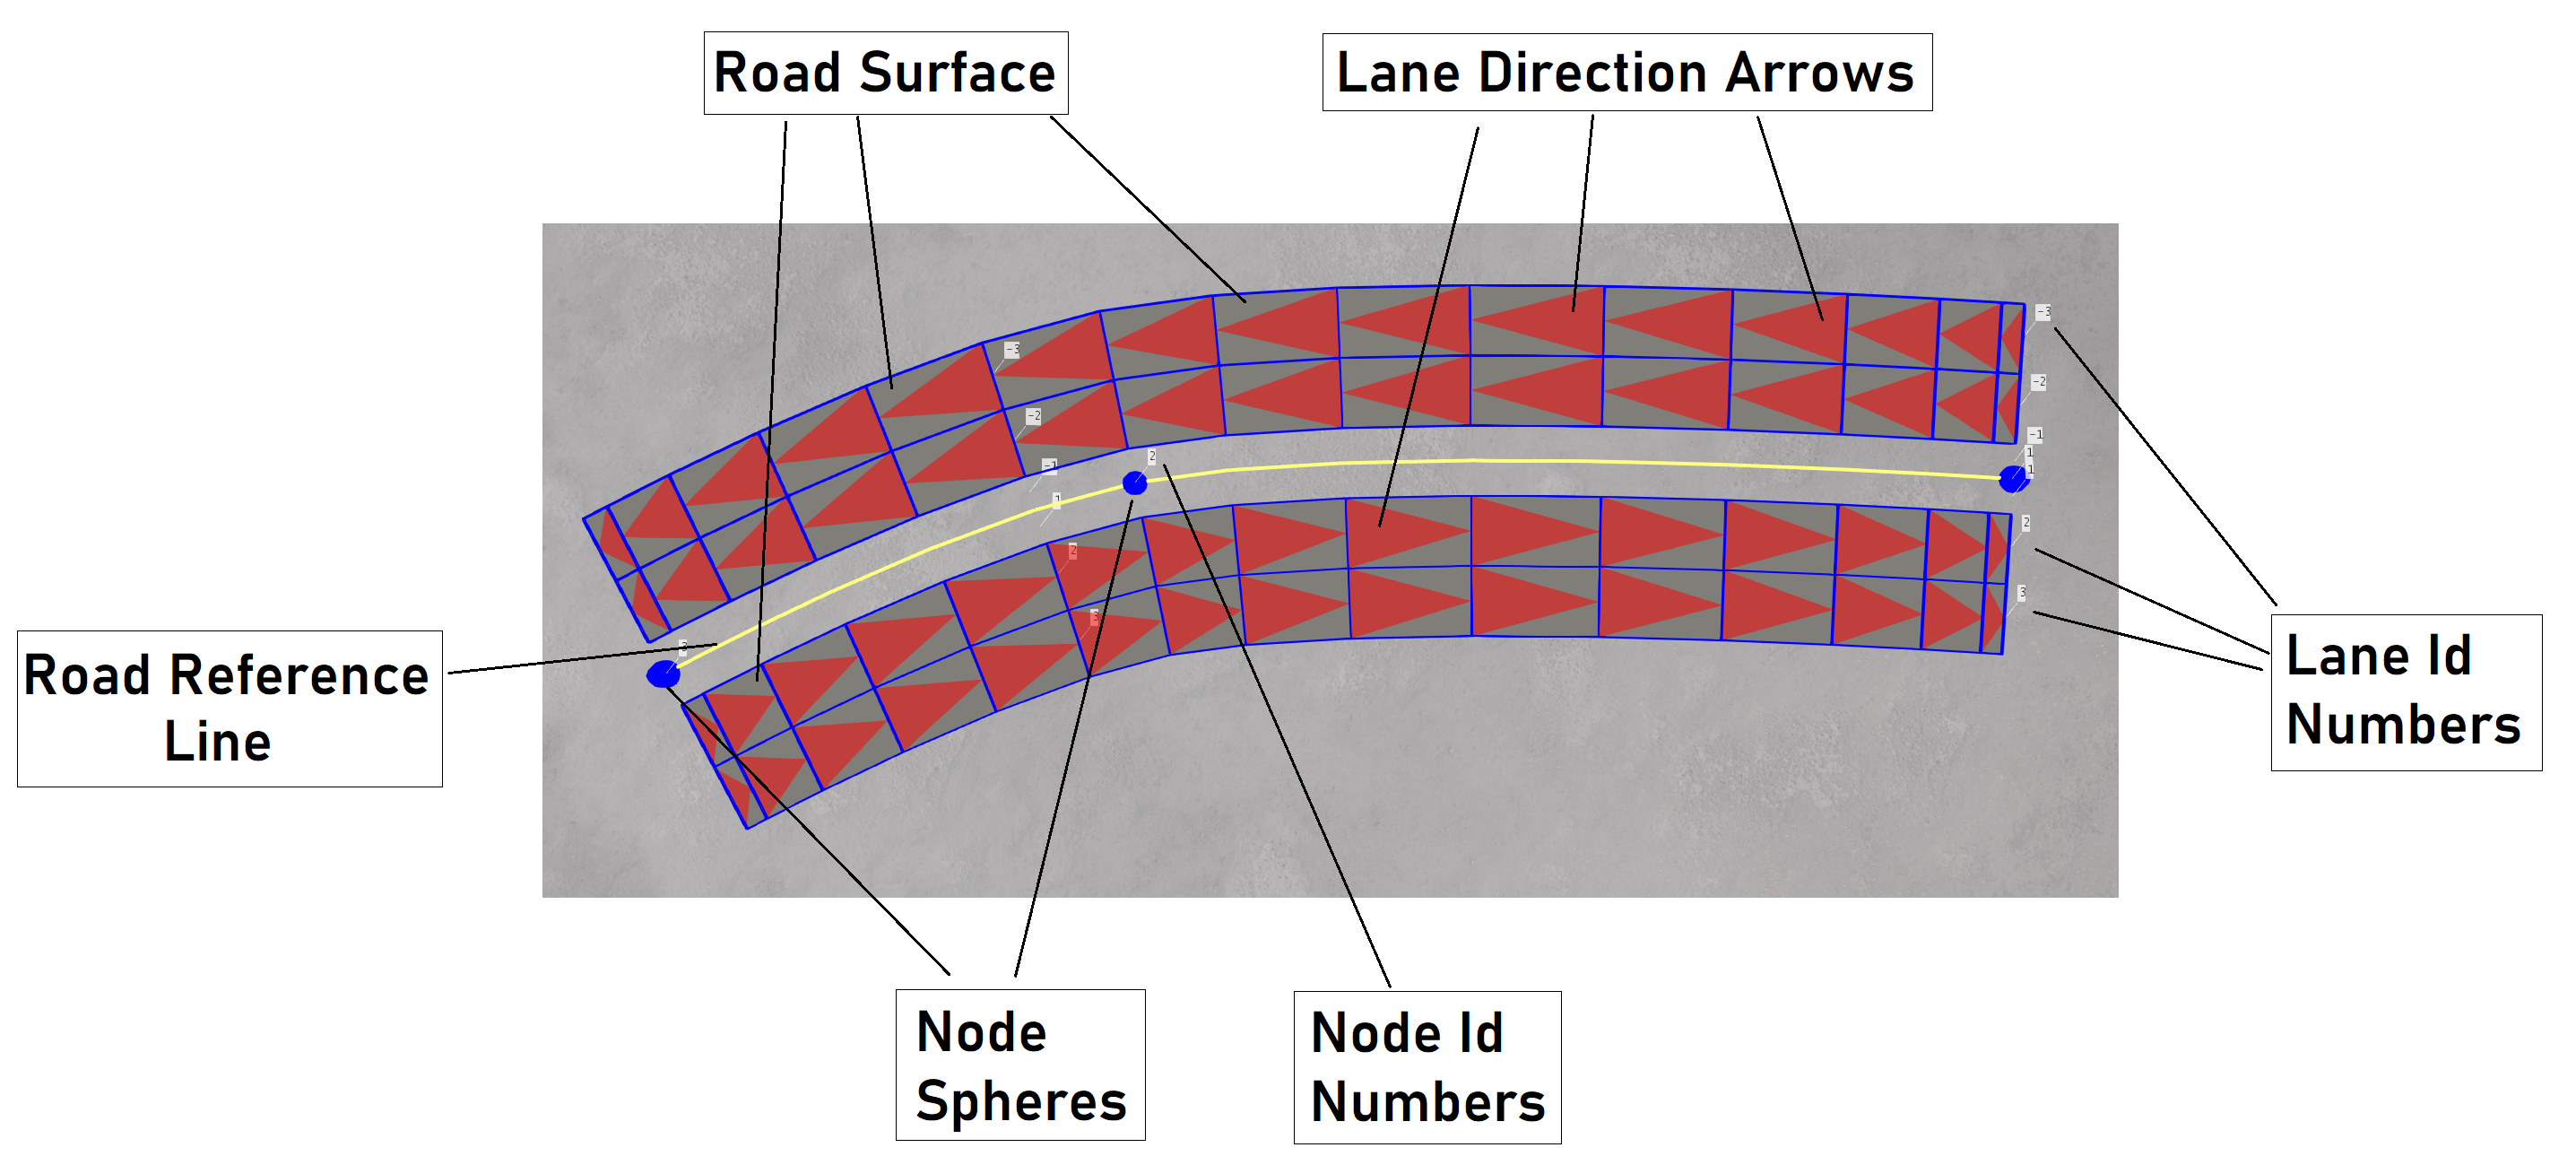
Using various combinations of the available visualisation components, it is possible to generate road images with different descriptive behaviour. The image below shows highlights some examples.

A ‘finalised’ road can either be mesh-based or decal-based. This is toggled from within the Road Edit Window.
Mesh-based roads will generate an actual 3D procedural mesh, ie the bricks and mortar of the road, lay this in place, and then lay any selected decals on top of this. This type of road would be required for any bridges or any other road which does not sit directly on top of the map terrain. Note that they are more costly in terms of performance and we recommend their usage to be minimised, especially if they are large and/or have fine granularity. They will require a large number of triangles in these cases, a factor by which the engine is limited.
Decal-based roads have no procedural meshes. They will simply lay the road surface decal and any lane marking decals directly on the terrain, following the road. These roads should ideally make up the bulk of roads in any network (if not all), and are much cheaper to manage computationally. This means a user with typical hardware should be able to have many more of them without running into simulation slowdowns etc.
Decal Editing:
The Road Edit Window provides various options for road decals, which can be toggled on or off as required.
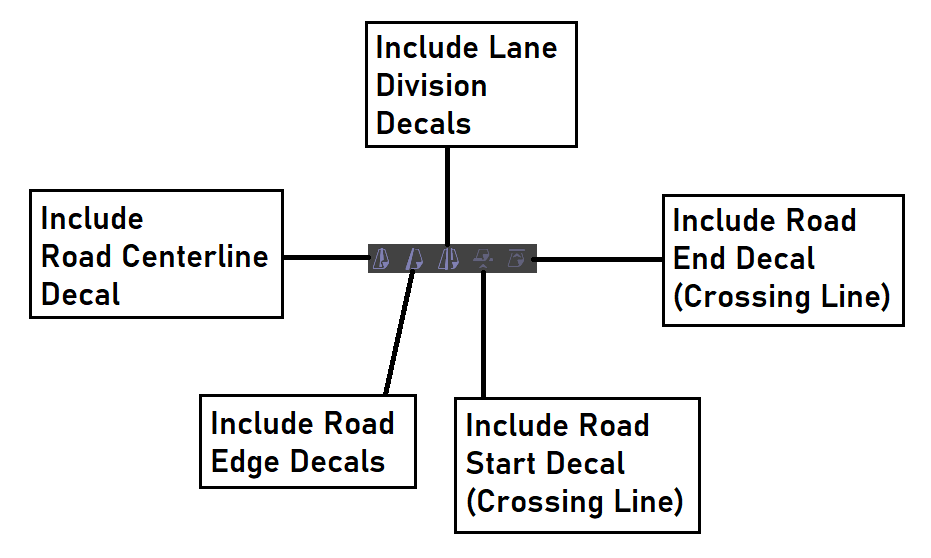
A road surface decal is always rendered, but the following decals are optional:
The Road Centerline Decal is a double line which appears along the center of each section of the road.
The Road Edge Decals are single lines which appear at both the left and right road edges, slightly inward from the road surface.
The Lane Division Decals are dotted lines which appear at the border between two adjacent lanes with the same direction.
The Road Start Line Decal is a single pedestrian crossing at the start of the road.
The Road End Line Decal is a single pedestrian crossing at the end of the road.
The Road Edit Window contains some options for each of these decals, which can be found towards the bottom of the window. Options will be visible only for decals which have been toggled on. Most decals have a slider for the decal width (eg centerline, road edge lines, lane division lines). Some also have a lateral offset slider (eg to move the road edge lines laterally). These can be used to style the road or to avoid any graphical glitches/conflicts which may arise between decals and meshes. The image below shows the result of changing various decal properties.