Group Editing
A Group is a collection of roads that work together in some way, such as forming a junction or an urban block. By grouping roads, you can move them together, rotate them around their center, conform the terrain to them, or delete them all with a single button press. Grouping offers these conveniences in the Road Architect tool and can also be used to quickly duplicate content, allowing you to build larger road networks efficiently. The tool provides a dedicated tab for Groups, located in the tool window under the control panel at the top. In this section, we’ll explore the various uses of groups, how to create them, and how to access the pre-made group content that comes with the tool.
Groups Tab
When the user selects the Groups tab, they will see the Groups List, which will initially be empty. Below the list are two mode buttons. The first button opens the Group Templates window and switches the tool to Group Template Preview Mode. The second button switches the tool to Create Group mode, where you can draw a fenced region (polygon) with the mouse to create a group from existing roads in the session. As groups are created, a collapsible header will appear with group-specific terraforming operations, which will be discussed later. Each row in the Groups List contains various buttons, as shown in the image below.

Note: There are two types of ‘Delete’ available in each row:
Hard Delete: Removes the group from the list, along with all the roads within the group (they will be removed completely from the session).
Soft Delete: Removes the group from the list, but leaves all the roads in the session.
Group Templates
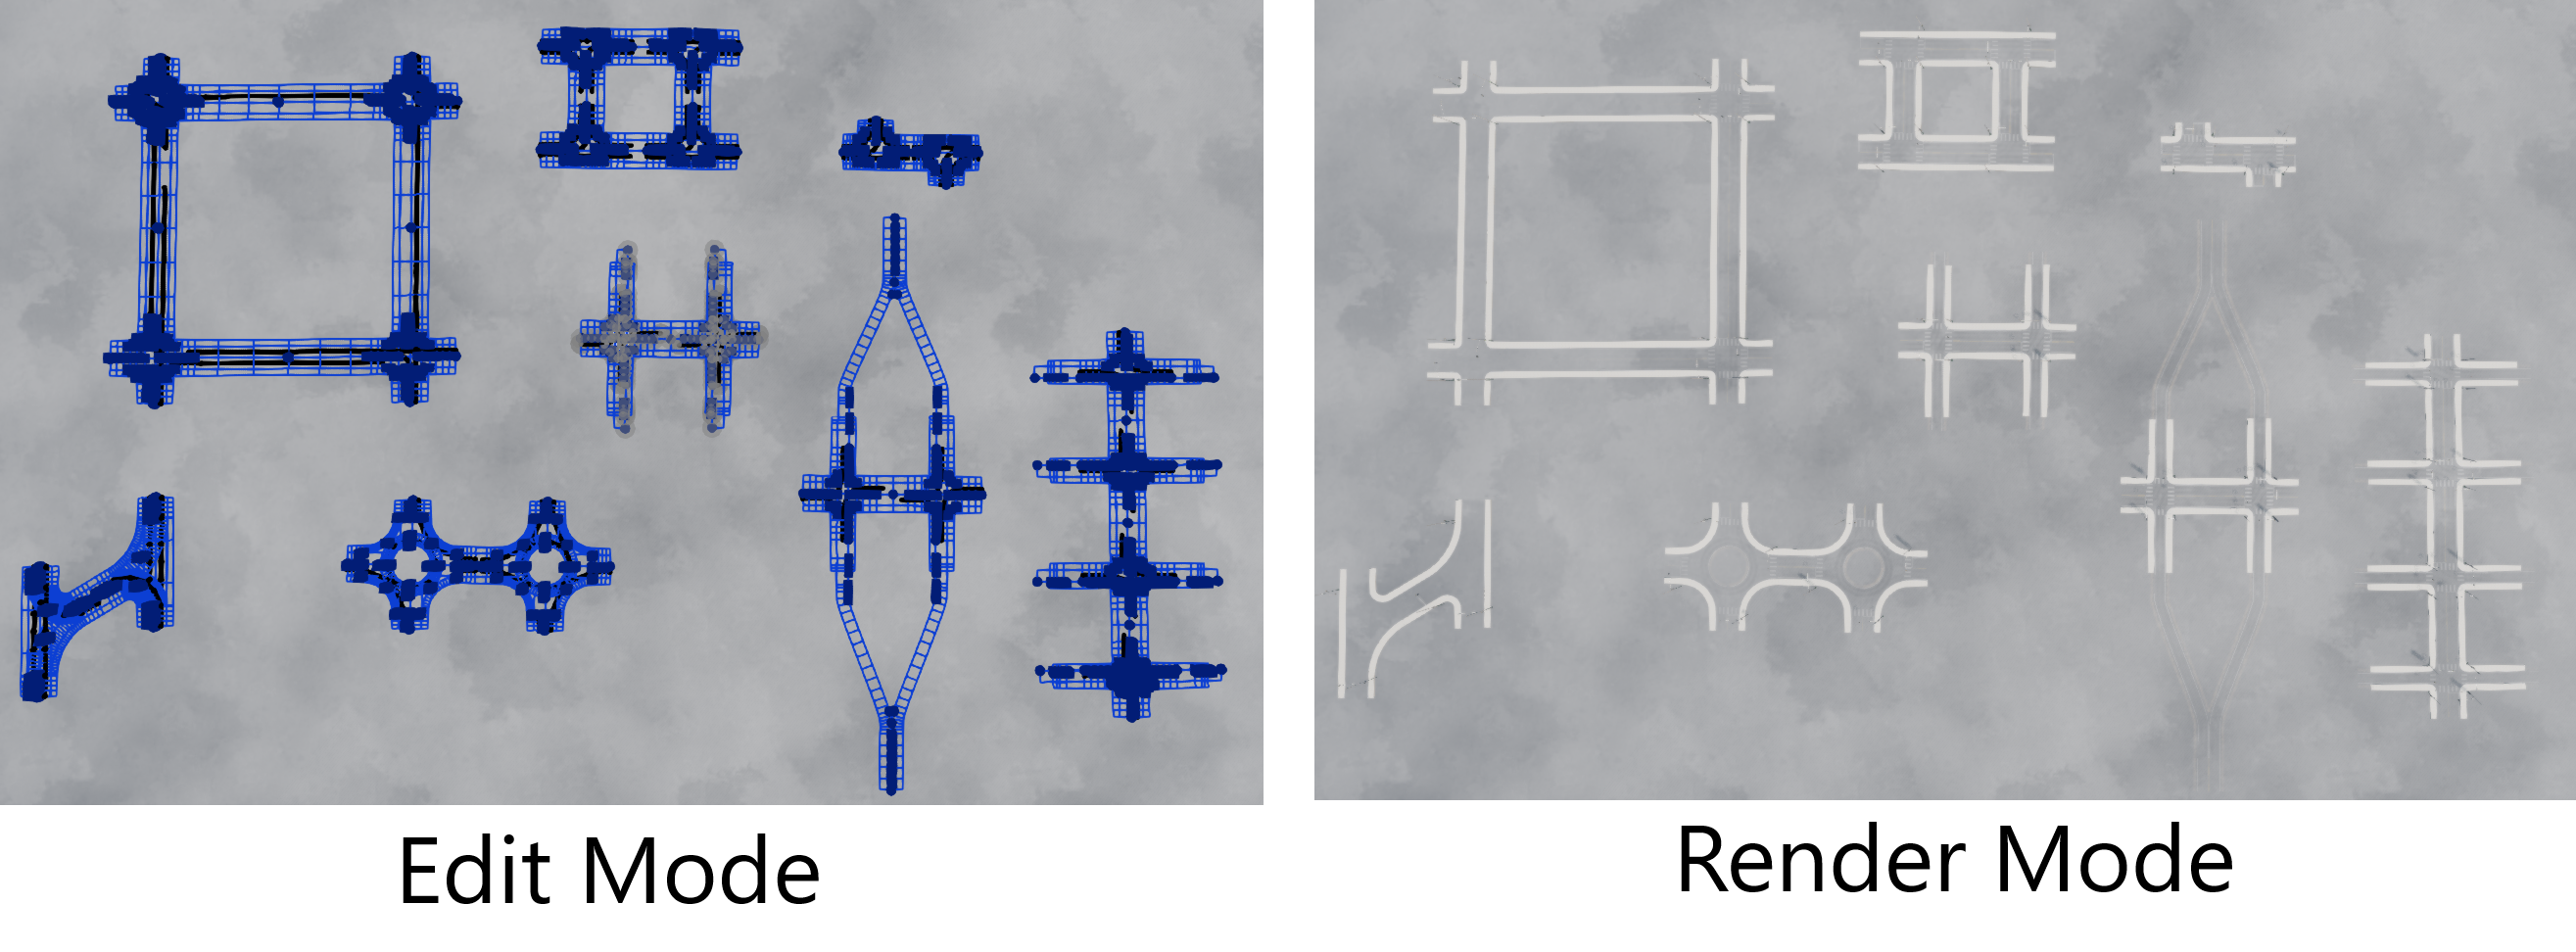
By selecting the Group Templates button under the Groups List, you can preview various pre-made groups (shipped with the tool) and any groups you’ve previously saved as templates (discussed below). These are Group Templates — fixed blocks of roads that can be placed and reused in different locations in the scene. Unlike junctions, you cannot edit group-specific properties such as the number of lanes, angles, or lengths of the roads in the group. Some example Group Templates are shown below.
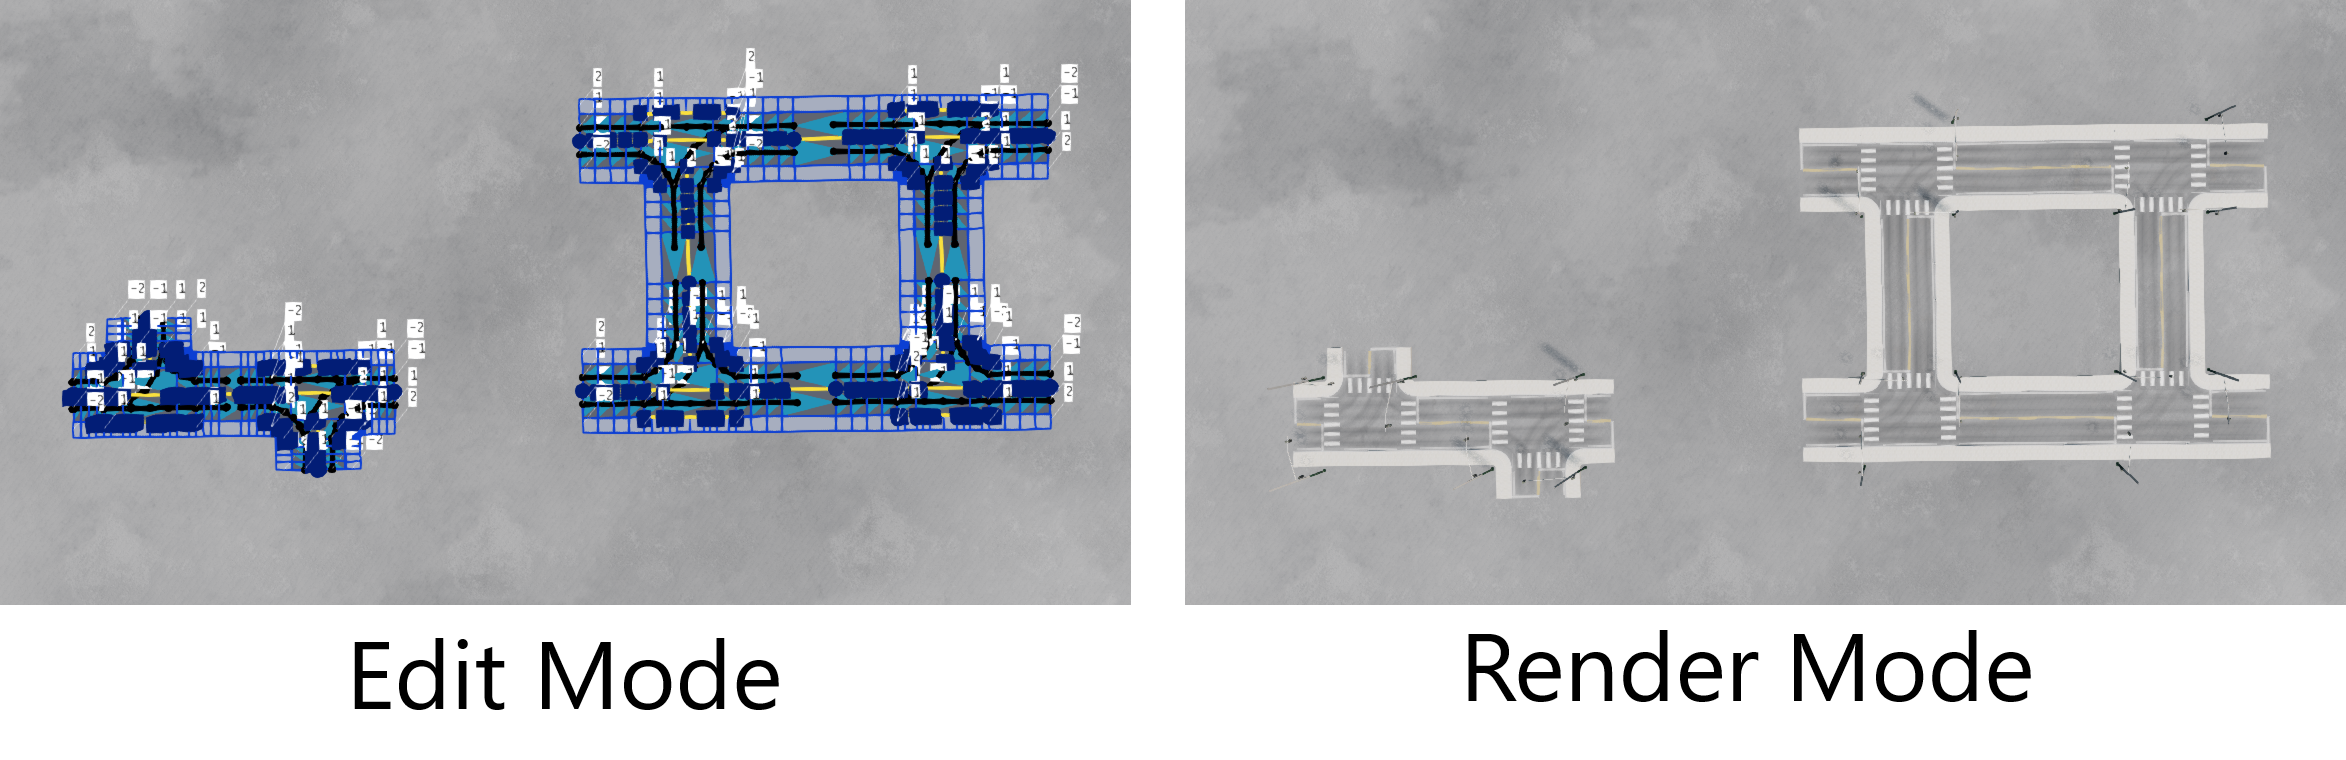
To select and place a group, click the ‘place’ button on the row of the group in the Groups List. The tool will switch back to its main view, and you’ll be able to control the group placement with the mouse cursor on the map. You can move the group into place by moving the mouse, and rotate it by holding down the left mouse button and dragging up or down, or by holding the SHIFT key for precise rotation. If you need to align the group with other roads in the scene, the Guidelines feature (discussed previously) will be helpful. To finalize the placement of the group, double-click the left mouse button. At this point, the mouse cursor will detach from the group. This process is illustrated below.

Even after placing the group, it can still be moved and rotated. Select the group from the Groups List to multi-select it. Switching to gimbal mode will place the gimbal at the center of the group, allowing you to move the entire group or rotate it as you did during the initial placement.
Note: If roads in a group are later joined to other roads, the group will disappear from the list since it’s no longer valid (it becomes ambiguous which roads are in the group and which are not). However, you can easily create a new group for the same roads if needed.
Creating Groups
Selecting the Create Group button under the Groups List switches the tool to Create Group mode. The mouse cursor will change color to indicate this mode. You can now draw a polygon by clicking the left mouse button at each node position, creating a bounding perimeter/fence around the roads you want to include in the group. The sequence of images below shows this process.
Double-clicking the left mouse button will close the polygon and create the group. It will appear at the bottom of the Groups List and will be automatically selected.
You can create a new group template from this group using the appropriate button in the group row in the Groups List. It will then appear in the Group Templates List, making it easy to duplicate content. An example of this is shown in the sequence of images below. First, we find some roads which we want to make the template profile from, then we use the ‘Create Group’ tool to draw a polygon around them. Double-clicking the left mouse button will close the polygon and create the group. It should now appear in the Groups List.
![Create Group Template - [part 1]](/world_editor/tools/road_architect/group_editing/createNew.png) Create Group Template - [part 1]
Create Group Template - [part 1]
In the new group which has been created in the Groups List, we can press the “Create New Template Profile” button, as shown in the image below.
![Create Group Template - [part 2]](/world_editor/tools/road_architect/group_editing/c3.png) Create Group Template - [part 2]
Create Group Template - [part 2]
The new template is now created and is available for selection in the Group Templates List, as shown in the leftmost image below. The rightmost image shows that it can be selected and placed on the map like any other Group Templates. The user may also save it to disk, if desired.
![Create Group Template - [part 3]](/world_editor/tools/road_architect/group_editing/c4.png) Create Group Template - [part 3]
Create Group Template - [part 3]
Note: when creating a group, it is not required that the user creates a new Group Template from it - the group can simply exist in the session and remain on the list. These groups, although saved in the session, are typically for temporary use only, such as when the user wishes to move sections of the road network together.
Shipped Content
The tool comes with some pre-made Group Templates, primarily to provide examples of simple groups that can be created. They can be used to quickly build larger networks by linking the roads together. Some of these are shown below.
Group Templates can also be saved or loaded using the corresponding buttons in the Group Templates Window.
Was this article helpful?