Materials
6.1 Purpose
Establish how materials are defined and organized, including texture inputs, reflection handling, and optimization.
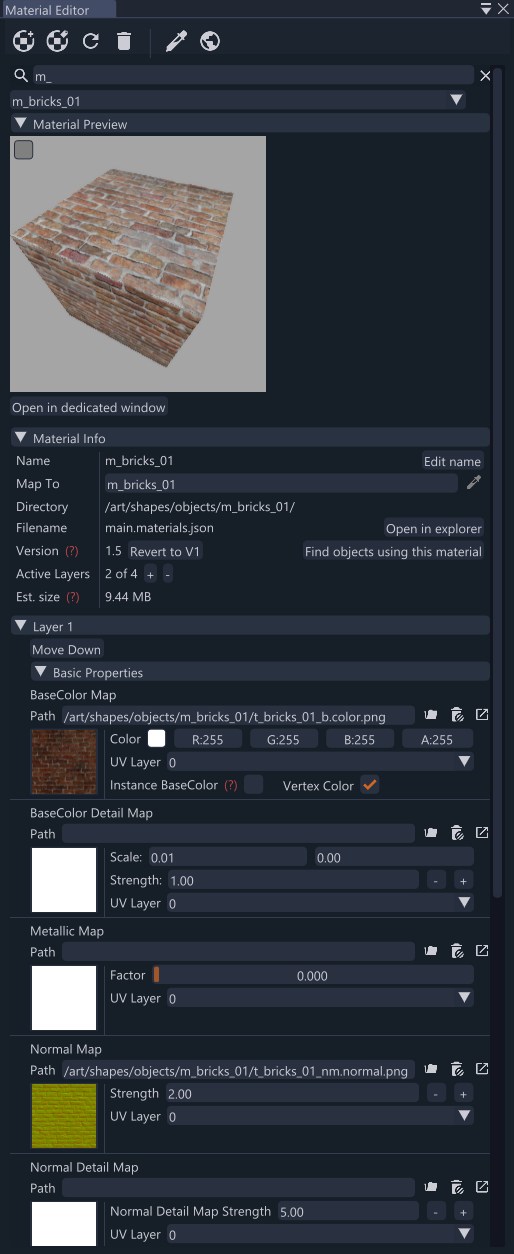
Material Editor can be opened from the Main menu bar: Window > Material Editor
6.2 Core concepts
Materials are defined in JSON (main.materials.json) and reference PNG textures via relative paths.
Material naming should align with mapTo entries in main.materials.json.
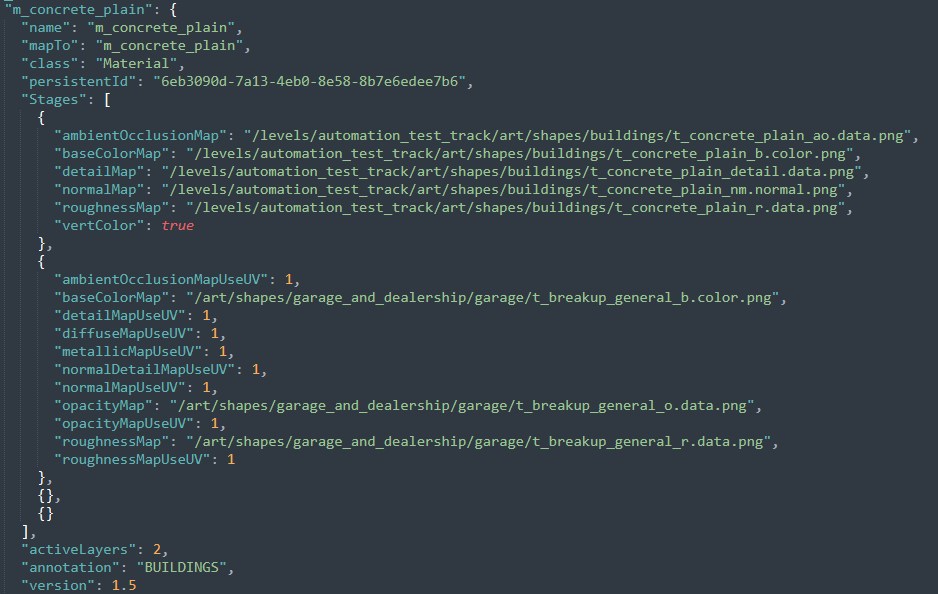 main.materials.json, example of a material definition
Reflections are controlled and assigned per material through Reflection Mode selection in the Advanced - All Layers section of Material Editor window. You’ll find 3 main option to choose from.
- None: no cubemap is used. Set as default and used for non-metallic and non-translucent materials
- Level: material uses reflection information from the level
- Cubemap: material uses reflection information from a custom cubemap (you can find some cubemaps already available in game)
A cubemap is a GPU texture that stores six equal-size square images corresponding to the faces of a cube (±X, ±Y, ±Z). It is sampled with a 3D direction vector.
Level is the best option to use if you want to generate correct reflections from your level.
Cubemaps can be found ready to be used online or created from the user.
Use cubemaps if you want to have custom reflections on your material.
Here’s an example of a custom cubemap created for West Coast map.
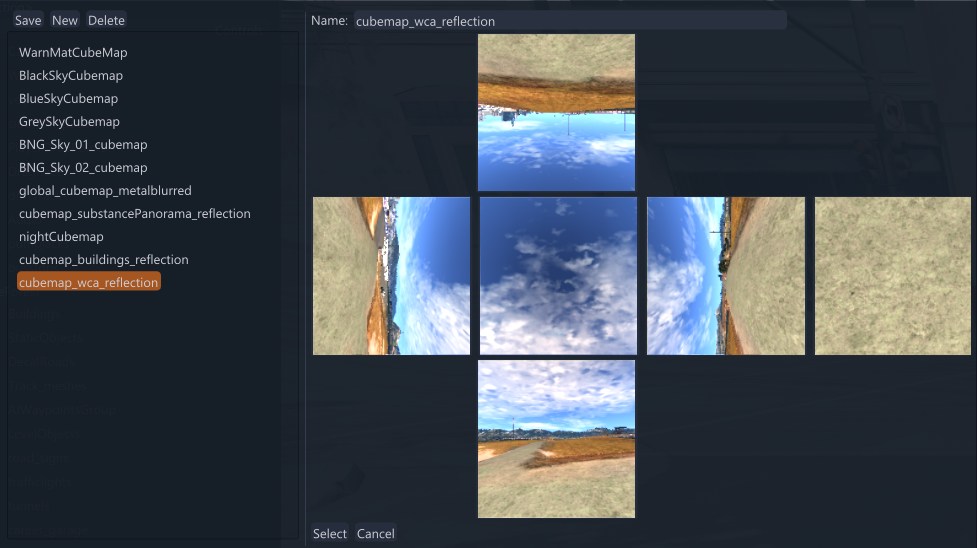 Custom cubemap created for the West Coast map
6.3 Materials import
If you want to apply your own materials to a mesh you should closely follow the pipeline below.
You can’t directly apply materials to a mesh inside the engine. Instead you need to use an external software (Blender, 3Ds Max, Maya, etc), apply the materials from there and export the mesh.
You have 2 possible path:
- Apply an already available material in game
- Create your own material
Apply an already available material in game
Let’s use Blender as software example.
 Applying an existing in-game material in Blender
Create your own material
First you need to create a new material using Material Editor in World Editor
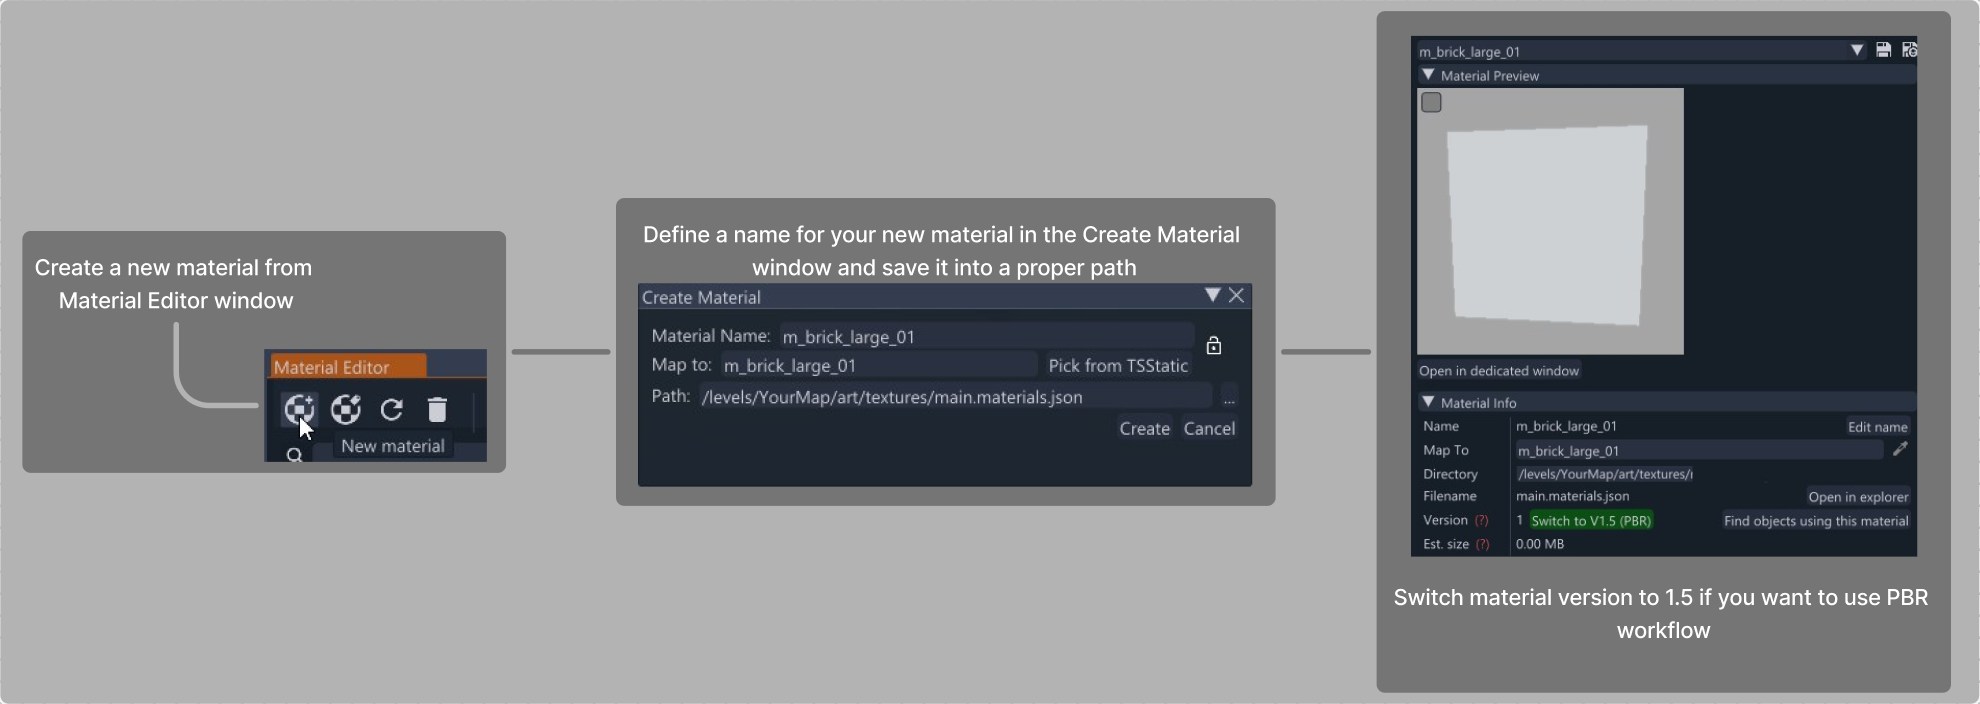 Creating a new material in the World Editor Material Editor
Once you’ve created your material(s) you can go on and add the textures in their specific channels and save the material(s).
Now you’re all set up to follow step 1 to apply your new material and import it in game.
6.4 Requirements and conventions
All texture assets are PNG. Paths must be relative to the level or art domain.
Use consistent naming for your material is strongly recommend to maintain a good organization.
Eg. m_concrete_old_trim_b_color.png
The suffix of the textures types should be respected for a correct texture baking.
*.color.png*.color.png*.data.png*.data.png*.data.png*.data.png*.data.png*.data.png*.data.png*.data.png*.data.png*.data.png*.data.png*.data.png*.normal.png*.normal.png*.normal.pngKeep material count reasonable within any single view. Prefer reuse across assets.
6.5 Texture inputs and calibration
Main texture inputs in Material Editor window include Base Color, Metallic, Normal, Roughness, Opacity and Ambient Occlusion maps
For more control over material details there are Base Color Detail and Normal Detail maps
Other advanced map channels are: Base Color Palette and Emissive
Maintain sensible value ranges for color and shading to avoid extremes.
BeamNG engine uses OpenGL normal map format. Verify normal map orientation is correct for the renderer when import textures.
6.6 Optimization
BeamNG maps uses a wide variety of textures resolution compared to material application.
Most of the textures used in game are built respecting 512px/mt as default resolution.
Use power‑of‑two (POT) texture sizes to keep correct proportions. You can also use 1:2 or 2:1 proportions but always respecting POT (eg. 512x512px, 1024x512px, 2048x4096px)
Share materials where possible to keep draw calls lower.
Texture memory should be monitored by choosing appropriate resolutions. Resource checker > Assets Stat can help overview the assets memory cost.
6.7 Data locations
- main.materials.json in the level or art domain.
- PNG textures under /art/textures and domain‑specific folders (/art/roads, /art/terrains, etc.).
See also: Material file format .
6.8 Common issues
- Missing textures due to path errors.
- Over‑strong reflections that flatten shading.
- Inconsistent material naming causing mapTo mismatches.
6.9 Validation criteria
- No missing or placeholder materials in representative scenes.
- Decals render cleanly without shimmer; atlases reduce material switches.
- Reflections appear coherent with surface type and environment intent.
Was this article helpful?